Posture Habits for Marathon Gamers: Play Pain-Free
The single most effective posture playbook for marathon gaming combines a linked ergonomic setup, a 20-8-2 movement rhythm, and targeted micro-mobility you can run during loading screens. Start right now with these three moves:
- Adjust your monitor and chair: Top third of your screen should sit at or just below eye level, about an arm’s length from your face. Raise or lower your chair so your elbows land at roughly 90° and your feet rest flat on the floor.
- Set a microbreak timer: Use a phone alarm, a desktop app like Stretchly, or a smartwatch to fire every 20–30 minutes. You will stand, shift position, or move for at least 2 minutes.
- Run a 60-second reset right now: Three slow neck rolls each side, five shoulder circles backward, ten wrist circles each direction. Done. You are already ahead of most players.
Quick stat: The 20-8-2 rule recommends a movement cycle balancing seated time, standing or position changes, and active movement within each half hour, supplemented by 5–10 minute mobility breaks every 60–90 minutes and 15–20 minute recovery blocks every 3–4 hours.
Table of Contents
- Which gamer type are you? Spot your posture pattern fast
- Why bad posture during long sessions causes real pain
- How to set up a neutral gaming station in under 10 minutes
- How to use your chair as the foundation of good form
- What does a healthy marathon gaming rhythm actually look like?
- Micro-movements and stretches that reset your body during breaks
- Which gear categories actually improve marathon posture?
- Why Habitposture’s habit-focused approach works for marathon gamers
- Key Takeaways
- The part most gamers skip (and why it costs them)
- Habitposture gear built for the marathon gaming routine
- Useful sources and further reading
Which gamer type are you? Spot your posture pattern fast
Most marathon gamers fall into one of four patterns. Knowing yours makes every fix in this article faster to apply.
The Sloucher rounds the lower back away from the chair’s lumbar support, especially after the first hour. The pelvis tilts backward, the thoracic spine curves into a C-shape, and the head drifts forward. Self-check: press your lower back against your chair. If there is a gap the size of your fist, you are slouching.
The Forward-Head Leaner sits upright at first but creeps toward the screen during tense moments. The chin juts out, the neck compresses, and the shoulders round inward. Self-check: look at your shadow on the wall or glance at your webcam. If your ears are in front of your shoulders, that is forward-head posture.
The Edge-of-Seat Percher sits on the front third of the chair, often during clutch rounds or ranked matches. The back never contacts the lumbar support, so the spine works unsupported for hours. Self-check: slide your hand behind your lower back. No contact with the chair? You are perching.
The Excessive Recliner leans the backrest past 120°, which feels relaxing but forces the neck to crane forward to see the screen and the arms to reach out unsupported. Self-check: if your forearms are floating in the air rather than resting on armrests or the desk, you have reclined too far.
Pro Tip: Set a 20-minute phone vibration alert labeled “posture check.” When it fires, freeze for three seconds and notice where your lower back is relative to the chair. That single awareness cue catches postural drift before it becomes pain, and it does not interrupt a single frame of gameplay.
Why bad posture during long sessions causes real pain
Forward head posture and prolonged static loading are the two biggest culprits behind gamer neck, shoulder pain, and reduced reaction speed. The mechanism is straightforward: your head weighs roughly 10–12 pounds in neutral alignment, but spinal loading research shows that for every inch the head moves forward, the effective load on the cervical spine roughly doubles. At a two-inch forward position, the neck is managing the equivalent of 20–24 pounds of force. Hold that for a prolonged period and the surrounding muscles, tendons, and discs accumulate strain that does not disappear when you log off.
Static postures compress spinal discs and reduce blood flow to the muscles holding you upright. The thoracic spine stiffens, limiting shoulder rotation and making it harder to keep your shoulder blades retracted. That stiffness feeds directly into slower mouse movement and reduced fine motor control, which matters in any game where milliseconds count.
Repetitive micro-tensions compound the problem. Death-gripping a mouse, holding a keyboard with raised wrists, or tensing the jaw during ranked play creates overuse patterns that build toward conditions like carpal tunnel syndrome over months of marathon sessions. The pain does not arrive all at once. It accumulates quietly until one session it simply does not go away.
How to set up a neutral gaming station in under 10 minutes
The single most important geometry rule: your monitor’s top third should sit at or just below eye level, arm’s length away, with your elbows at roughly 90° and your feet flat. Everything else flows from that anchor.
Key measurement targets
| Measurement | Target Range | Why It Matters |
|---|---|---|
| Monitor distance | about an arm’s length | Reduces eye strain and forward-head lean |
| Screen top position | At or slightly below eye level | Keeps neck in neutral flexion |
| Chair back angle | 100–110° | Lowers disc pressure vs. rigid 90° |
| Elbow angle | 85–95° | Prevents shoulder elevation and wrist strain |
| Seat depth | 2–3 fingers between seat edge and back of knee | Supports thighs without cutting circulation |
| Keyboard tilt | Neutral or slight negative tilt | Reduces wrist extension and repetitive strain |
A slight recline of 100–110° consistently outperforms a rigid 90° upright position for long sessions because it distributes spinal load across the backrest rather than concentrating it on the lumbar discs.
Fast setup checklist
- Sit all the way back in your chair so your lower back contacts the lumbar support.
- Adjust seat height until your feet rest flat and your thighs are roughly parallel to the floor.
- Set armrests so your elbows are at 85–95° with shoulders relaxed, not shrugged.
- Position your monitor so the top third of the screen is at or just below eye level.
- Move the monitor to arm’s length (about an arm’s length). Use a monitor arm if your desk does not allow this.
- Place your keyboard so your wrists stay neutral or in a slight negative tilt. Flip-out keyboard feet raise the back edge and increase wrist extension, so leave them folded down.
- Position your mouse within easy reach so your elbow stays close to your body.
- Check that your feet are fully supported. If the floor is too far, use a footrest or a firm book.
Couch or low-desk workaround: If you game from a couch, a lap desk with a built-in wrist rest brings the keyboard to elbow height. Prop your screen on a TV tray or monitor stand so you are not looking down. It is not perfect, but it is far better than craning your neck at a 30° downward angle for four hours.
How to use your chair as the foundation of good form
Sitting all the way back with lumbar support engaged and a 100–110° backrest angle is the single best default for marathon sessions. Most gamers never actually use the lumbar support because they perch forward the moment the game gets tense.
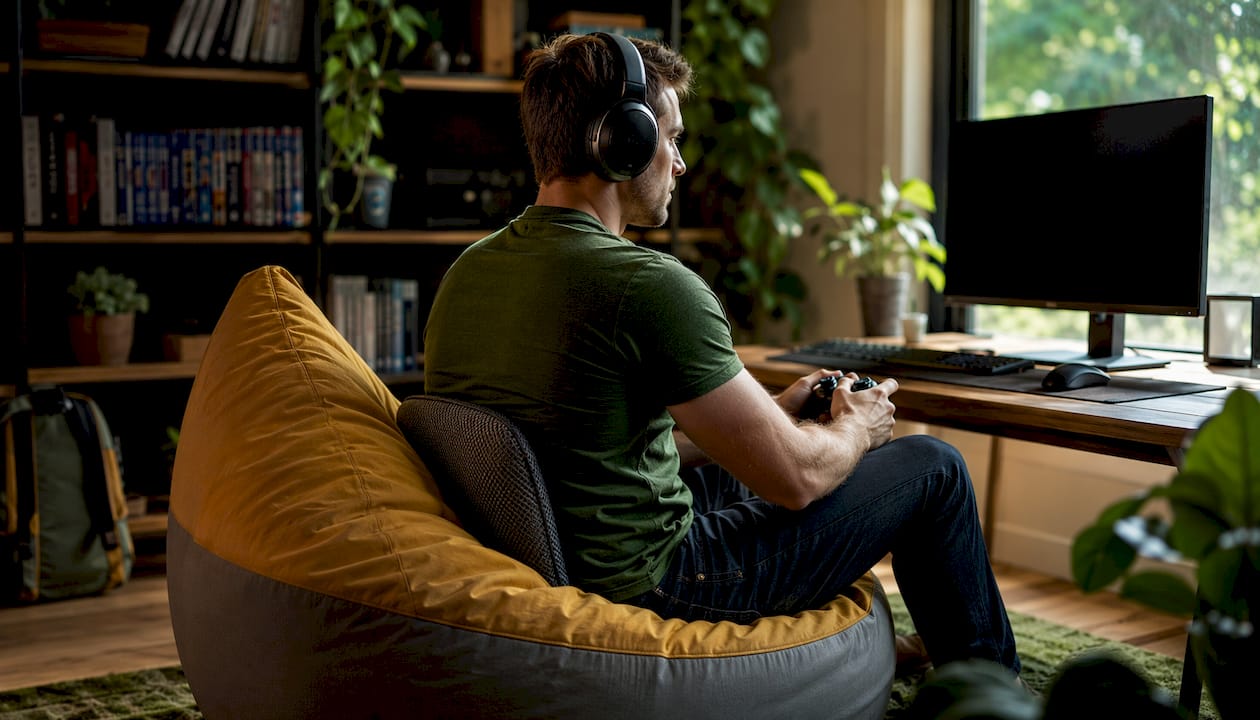
Seat height: Adjust until your feet are flat and your thighs are parallel to the floor. If the seat is too high, your feet dangle and your hamstrings tighten. Too low, and your knees rise above your hips, tilting the pelvis backward into a slouch.
Lumbar position: The lumbar pad should press gently into the natural inward curve of your lower back, roughly at belt height. If it sits too high, it pushes into the mid-back and actually increases forward head posture. Too low and it does nothing.
Armrest height: Set them so your shoulders are relaxed and your elbows are supported at 85–95°. Armrests that are too high shrug your shoulders; too low and you lean sideways to reach them.
Recline: Lock in at 100–110°. Going past 120° forces your neck forward to see the screen. Staying at a rigid 90° loads the lumbar discs more than a slight recline does. See the gaming chair posture guide for chair-specific adjustments.
Per-type chair corrections
- Sloucher: Move the lumbar support up or down until it fills the gap in your lower back. Set a sticky note on your monitor: “Lower back touching?”
- Forward-head leaner: Raise your monitor before adjusting the chair. The lean usually comes from a screen that is too low, not from the chair itself.
- Edge-of-seat percher: Train a “sit-back” reset during every loading screen. Press your lower back into the support deliberately. It takes about two weeks to make this automatic.
- Excessive recliner: Reduce recline to 110° and raise armrests so your arms are supported without reaching. Add a lumbar roll if the backrest gap is too large at that angle.
Pro Tip: Bucket-style gaming chairs with exaggerated side bolsters look great but can lock your hips into a fixed position and prevent the small positional shifts that reduce fatigue. If your chair’s bolsters grip your thighs tightly, you are losing the micro-movement that keeps circulation going. A flatter seat pan with a separate lumbar cushion often works better for sessions over three hours.
What does a healthy marathon gaming rhythm actually look like?
The 20-8-2 microcycle is the most practical evidence-backed rhythm for long sessions: 20 minutes seated in neutral alignment, 8 minutes in a changed position (standing, leaning, or shifting weight), and 2 minutes of active movement, repeated across the session. Supplement that with structured mobility breaks every 60–90 minutes and a longer recovery block every 3–4 hours.
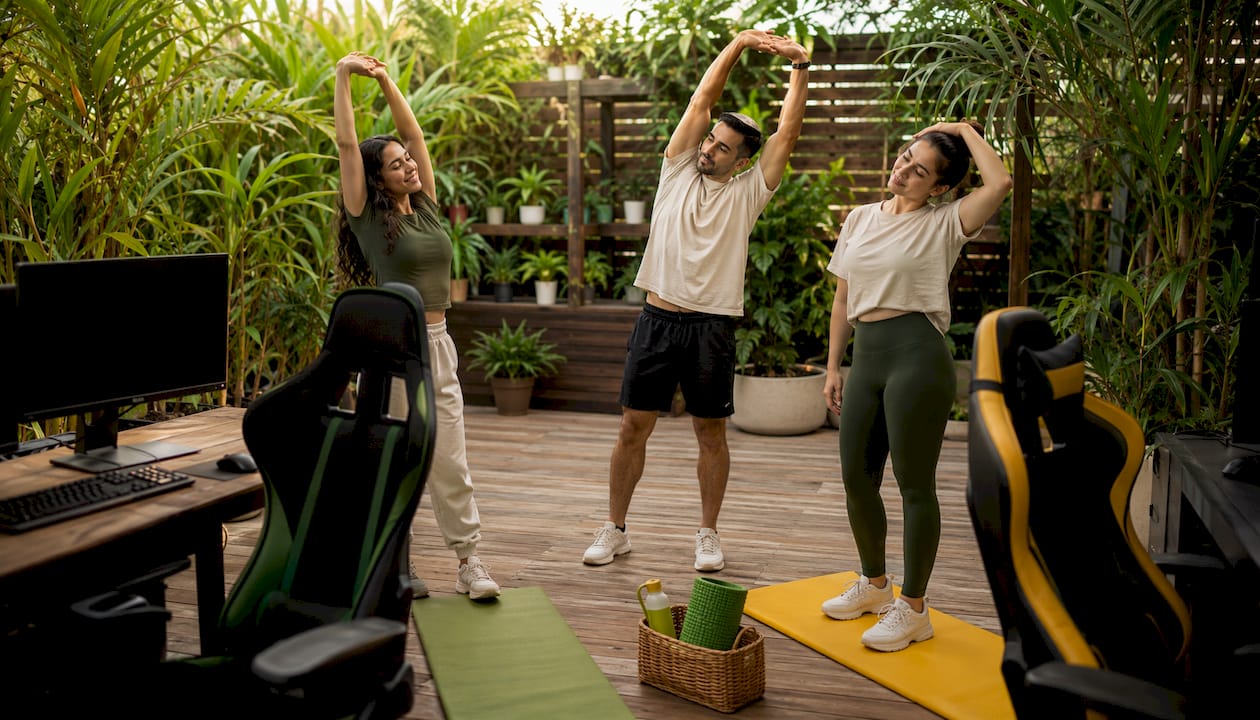
Sample marathon session schedule
| Time Block | Activity | Duration |
|---|---|---|
| Every 30 min | 20-8-2 microcycle | 2 min active movement |
| Every 60–90 min | Mobility flow (neck, shoulders, hips) | 5–10 min |
| Every 3–4 hours | Full recovery block (walk, stretch, eat) | 15–20 min |
Using game flow as your timer: You do not need to pause mid-match. Use natural game triggers instead.
- Loading screens and map transitions: stand up, shift weight, or do a quick shoulder roll.
- Respawn timers: wrist circles and neck side-bends.
- Round ends or lobby waits: stand and do five hip hinges or calf raises.
- Queue times: walk to the kitchen, refill water, and do a 30-second thoracic stretch.
Tools to automate reminders:
- Stretchly (free, desktop): customizable microbreak popups with stretch suggestions.
- Time Out (Mac): gentle screen overlays at set intervals.
- Smartwatch vibration alerts: set a recurring 20-minute haptic reminder so you feel it without looking away.
- Stream overlays: if you stream, a visible break timer keeps your audience engaged and keeps you accountable.
Micro-movements and stretches that reset your body during breaks
Prioritize neck, shoulders, wrists, thoracic spine, and hips. Those five zones accumulate the most tension during marathon play, and targeting them in short bursts prevents the stiffness from compounding across hours.
30–60 second microbreak sequence (every 20–30 min)
- Neck side-bend: Tilt your right ear toward your right shoulder, hold 10 seconds, switch sides.
- Shoulder rolls: Five slow circles backward, then five forward.
- Wrist circles: Ten rotations each direction, then open and close your fists five times.
- Chin tuck: Pull your chin straight back (not down), hold 5 seconds, release. Repeat three times.
5–10 minute hourly mobility flow
- Thoracic extension over chair back: Clasp hands behind your head, lean back over the top of your chair, hold 10–15 seconds. Repeat twice.
- Hip flexor stretch: Step one foot forward into a lunge, lower the back knee to the floor (or a cushion), hold 20–30 seconds each side.
- Doorway chest opener: Place forearms on a doorframe at 90°, step one foot through, hold 20 seconds.
- Standing cat-cow: Hands on knees, alternate arching and rounding your back five times.
- Neck rotation: Slowly turn your head left and right, five reps each side.
15–20 minute recovery block (every 3–4 hours)
Walk for at least five minutes. Add a short mobility routine covering the full sequence above plus a standing forward fold (30 seconds) and a seated piriformis stretch (30 seconds each side). Eat something with protein and drink at least 150–250 mL of water before returning to your station.
Safety note: if you are in acute pain, skip aggressive stretches and focus on gentle range-of-motion movements. Progress gradually over days, not within a single session.
Pro Tip: During a live stream, frame microbreaks as part of your content. “Alright chat, I’m doing my 20-minute posture reset” takes five seconds to say and keeps viewers engaged. Competitive players can use respawn animations as a cue to do a silent chin tuck and shoulder roll without ever leaving the chair visibly. Nobody on your team will notice.
Which gear categories actually improve marathon posture?
Buy gear to solve a specific mismatch in your setup, not to upgrade for its own sake. Small adjustments to monitor height, keyboard placement, and mouse proximity often resolve the majority of postural problems without expensive purchases.
Ergonomic chair (high-back with adjustable lumbar): The single highest-impact purchase for marathon sessions. Look for adjustable lumbar depth and height, a seat pan you can tilt, and armrests that move in at least two directions. Avoid chairs with fixed lumbar bulges that cannot be repositioned.
Lumbar support cushion: A good add-on if your current chair’s built-in lumbar is too firm, too soft, or in the wrong position. Choose one with adjustable straps and a memory foam or mesh core. Avoid thick, wedge-shaped cushions that push you too far forward on the seat.
Monitor arm: Worth every dollar if your monitor cannot reach the right height on its stand, or if you use multiple screens. Look for full-motion arms (tilt, swivel, height) with a weight rating that matches your monitor.
Footrest: Useful if your feet dangle when your chair is at the correct height. A simple angled footrest works as well as expensive models. Avoid footrests with massage rollers that encourage constant foot movement and distract focus.
Posture wearables and sensor apps:
- Wearable posture sensors (clip-on or adhesive) vibrate when you slouch. They work well as a training tool for the first few weeks, then become less necessary as the habit forms.
- App-based reminders (Stretchly, PostureZone) are lower-cost and sufficient for most gamers.
- The risk with wearables: if the vibration fires constantly, you start ignoring it. Use them for 2–3 week habit-building sprints, not indefinitely.
Rarely worth the money: Specialized “gamer posture” seat wedges with no lumbar adjustment, overpriced wrist rests thicker than 1 inch (they raise your wrists into extension), and monitor risers that only add height without tilt adjustment.
Why Habitposture’s habit-focused approach works for marathon gamers
A linked-system approach is necessary because upgrading one component without aligning the rest often creates new compensations. Habitposture’s approach goes one step further: it pairs physical gear with habit triggers so the correction becomes automatic rather than something you have to consciously remember.
The core idea is simple. A posture habit forms when a physical cue (the gentle pressure of a lumbar support, the subtle feedback from a posture corrector) is paired with a repeatable trigger in your gaming routine, like a loading screen or a respawn timer. Over time, the cue fires the correction without any mental effort. That is the difference between a one-off gear purchase and a lasting change.
Thomas, the author behind Habitposture’s gamer posture content, focuses on translating ergonomics research into practical, low-friction habits for people who spend 8+ hours at a screen. Habitposture’s product line, including adjustable posture correctors, lumbar supports, and high-back gaming chairs, is designed to serve as the physical half of that habit loop.
Key Takeaways
Good posture habits for marathon gamers come down to one principle: build a linked setup, move on a rhythm, and let gear cues do the reminding.
| Point | Details |
|---|---|
| Linked neutral setup | Monitor top third at eye level, about an arm’s length away; elbows at 90°; chair reclined 100–110° with lumbar engaged. |
| 20-8-2 movement rhythm | Every 30 minutes: 20 min seated, 8 min position change, 2 min active movement; longer breaks every 60–90 min. |
| Micro-mobility during breaks | Prioritize neck, shoulders, wrists, thoracic spine, and hips with 30–60 second resets at every microbreak. |
| Hydration and nutrition | Drink 150–250 mL of water every 20–30 minutes; eat a protein-containing snack during every 3–4 hour recovery block. |
| Habitposture gear as habit cue | Habitposture lumbar supports and posture correctors serve as physical triggers that reinforce neutral alignment automatically. |
Expect new ergonomic habits to feel slightly effortful for the first 2–3 weeks. By week four, the sit-back reset, the microbreak timer, and the neutral wrist position typically start to feel like the default rather than a correction.
The part most gamers skip (and why it costs them)
The conventional wisdom on gaming posture focuses almost entirely on gear: get a better chair, buy a monitor arm, add a wrist rest. That advice is not wrong, but it misses the bigger problem. Gear without habit is just furniture.
The gamers who actually reduce pain over a season are not the ones with the most expensive setups. They are the ones who built a repeatable trigger into their routine, something as simple as pressing their lower back into the chair every time a loading screen appears. That two-second action, done consistently, rewires the body’s default position more effectively than a $600 chair used passively.
There is also a performance angle that most ergonomics content ignores. Poor posture-related fatigue degrades reaction time and decision-making, not just comfort. Top esports organizations now treat physical conditioning as a competitive metric, not a wellness afterthought. If you are grinding ranked for six hours and your thoracic spine is locked up by hour three, you are not playing at your ceiling. You are playing through accumulated physical debt.
The posture-mood connection matters too. Slumped posture correlates with lower energy and reduced focus, which means the physical and mental costs of bad form compound each other across a long session. Fixing your setup is not just about avoiding pain. It is about showing up to every match at full capacity.
— Thomas For marathon streamers who need stable, high-performance hosting to maintain their streaming setup, consider reliable Game VPS Hosting to avoid interruptions during your long sessions.
Habitposture gear built for the marathon gaming routine
If you have read this far, you already have the setup knowledge. What Habitposture adds is the physical layer that makes the habits stick.
Habitposture’s adjustable lumbar supports are designed to fill the gap between your lower back and your chair’s backrest, giving the sloucher and the percher a constant, gentle reminder to sit back. The posture correctors work the same way: wear one during your session and it cues your shoulders back without restricting movement. For recovery, Habitposture’s massage guns target the neck, traps, and forearms, the exact zones that accumulate the most tension during marathon play.
Here is how to match the gear to your type: slouchers and perchers get the most from a lumbar support worn during play; forward-head leaners benefit most from a posture corrector that pulls the shoulders back and reduces the forward drift; excessive recliners need a chair adjustment first, then a lumbar roll to maintain the curve at 110°. Any gamer doing 3+ hour sessions can add a massage gun to the recovery block.
Browse the full range and find your starting point at Habitposture. Your body will thank you by hour five.
Useful sources and further reading
These are the primary sources behind the recommendations in this article. Each one is worth bookmarking if you want to go deeper on a specific topic.
- OSHA Computer Workstation Guidelines: The U.S. government’s official monitor height, distance, and tilt specifications. The authoritative source for neutral setup geometry.
- OSHA Ergonomics: Identify Problems: Broader ergonomic risk identification framework; useful for understanding how repetitive strain builds across a workday or gaming session.
- Cornell Human Factors and Ergonomics Research Group: Academic ergonomics guidance covering workstation setup, break timing, and musculoskeletal load. One of the most cited sources in applied ergonomics.
- PubMed: Cervical spine loading and head posture: The peer-reviewed study on how forward head posture multiplies effective cervical spine load. The basis for the head-weight claims in this article.
- PubMed: Musculoskeletal disorders and prolonged sitting: Research on how static seated postures contribute to musculoskeletal disorders over time.
- Frontiers in Neurology: Esports and musculoskeletal health: Peer-reviewed review of injury patterns and ergonomic risk factors specific to esports athletes.
- Cleveland Clinic: Importance of good posture while gaming: Clinical perspective on gamer posture from a major U.S. health system.
- NHS: Carpal tunnel syndrome: Clinical overview of carpal tunnel causes, symptoms, and prevention; relevant to wrist position and grip habits.
- Uplift Desk: The 20-8-2 rule: The source for the 20-8-2 microcycle timing and break frequency recommendations used throughout this article.
- The Fountain: Gaming marathons with less pain: Practical micro-mobility routines and timing recommendations for long gaming sessions.