Lower Back Support for Your Makeshift Home Office
Lower back support in a makeshift home office is best achieved through a firm, properly positioned DIY lumbar support device combined with ergonomic chair adjustments that maintain your spine’s natural inward curve. Remote workers spending 8 or more hours seated face real risks. Without lumbar support, the spine slumps forward, placing sustained load on spinal discs and muscles, which causes the mid-afternoon ache that creeps up before you even notice it. The good news is that effective DIY lumbar support costs effectively nothing and works immediately.
What materials do you need for makeshift lumbar support?
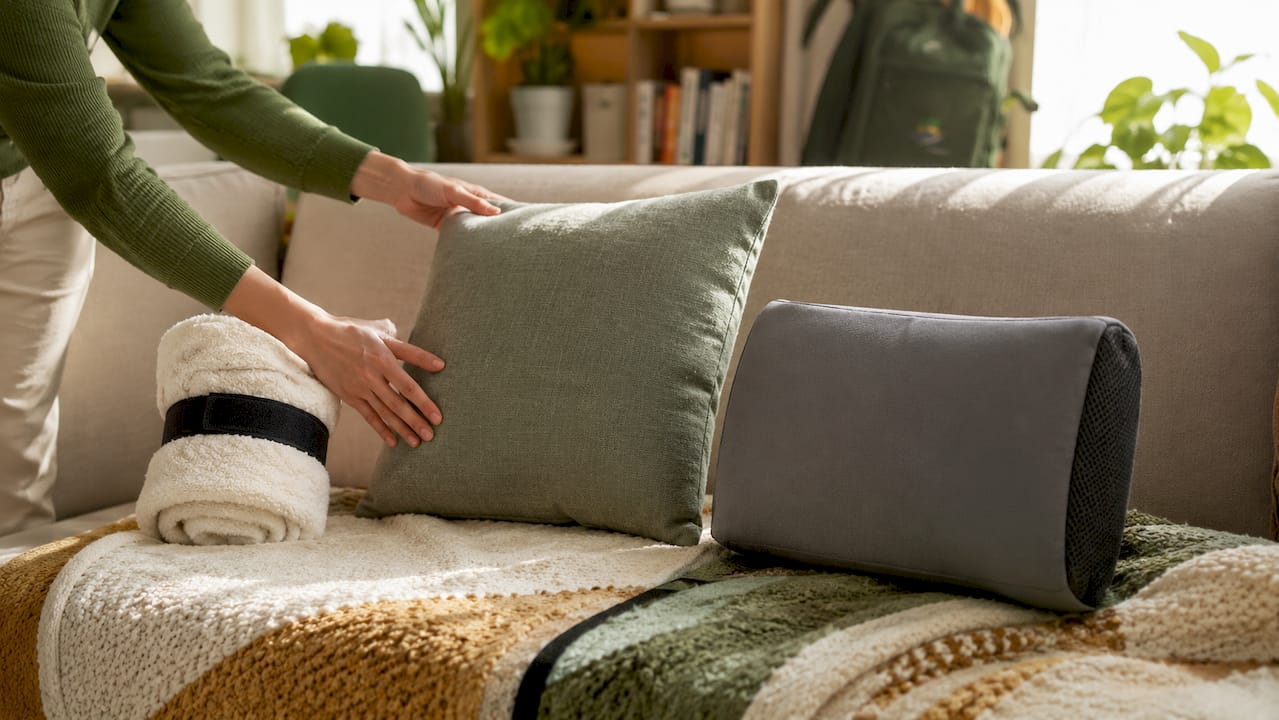
The best materials for DIY lumbar support are firm, shapeable, and available in most homes right now. Bath towels, rubber bands, Velcro strips, and tightly stuffed pillowcases are the four go-to options. Each one can be shaped into a lumbar roll that fits the small of your back without requiring any tools or spending.
Firm materials are non-negotiable. Soft pillows collapse under pressure within minutes, which means your spine loses support exactly when you need it most. A tightly rolled bath towel secured with rubber bands or Velcro holds its shape through an 8-hour workday and costs nothing.
| Material | Firmness | Durability | Cost |
|---|---|---|---|
| Rolled bath towel | High | Medium (reshaping needed daily) | $0 |
| Stuffed pillowcase | Medium-High | Medium | $0 |
| High-density foam offcut | Very High | High | Low |
| Velcro-secured towel roll | High | High (stays in shape) | $0 |
| Soft decorative pillow | Low | Low (collapses quickly) | $0 |
The table above makes one thing clear: a Velcro-secured towel roll beats a soft pillow on every metric that matters. Soft materials feel comfortable for the first 20 minutes, then quietly fail you for the rest of the day.
Pro Tip: Make two rolls at the same time. Keep one at your desk and one nearby. When the first one loses shape mid-afternoon, swap it out without breaking your focus.
How to build and position a DIY lumbar roll
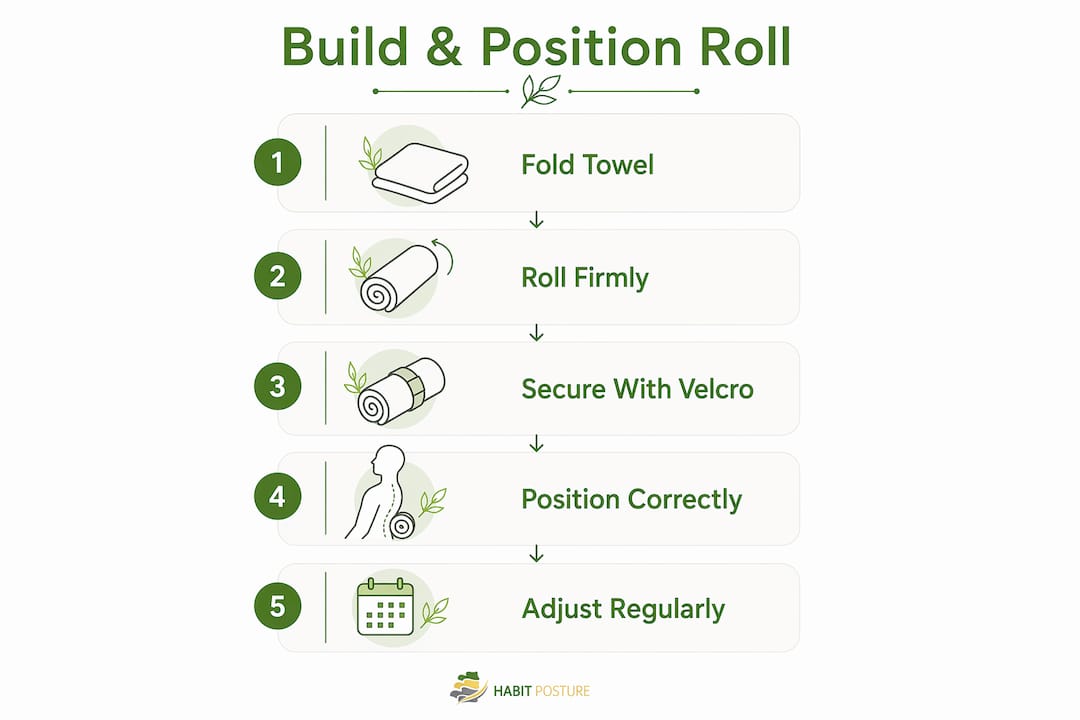
Building an effective lumbar roll takes about three minutes. The positioning takes a little longer to dial in, but once you get it right, your back will tell you immediately.
Step-by-step: building the roll
- Lay a standard bath towel flat on a surface.
- Fold it lengthwise twice so it forms a long, narrow strip.
- Roll it tightly from one end to the other, keeping consistent pressure throughout.
- Secure the roll with two rubber bands or a strip of Velcro at each end.
- Test the firmness by pressing your palm into the center. It should resist, not compress.
If the roll feels too soft, add a second folded towel inside before rolling. If it feels too wide for your chair, trim the length by folding the ends inward before securing.
Positioning it correctly
Proper placement is the single most important factor. Most remote workers place the roll too low, near the sacrum, which actually increases lower back strain instead of relieving it. The correct position is at the natural inward curve of the lumbar spine, roughly at the level of your belly button when seated.
- Sit fully back in your chair so your hips touch the backrest.
- Place the roll between your lower back and the chair backrest.
- Adjust the height until the roll fills the gap at the small of your back without pushing you forward.
- Your pelvis should feel upright and neutral, not tilted forward or backward.
- Check that your shoulders stay relaxed and your feet rest flat on the floor.
A roll placed too high lands in the mid-back and creates a different kind of tension. A roll placed too low pushes the pelvis forward and causes the spine to round. The sweet spot is the lumbar curve, and keeping the pelvis neutral is the goal.
Pro Tip: Set a phone alarm for every 90 minutes to check your roll’s position. It shifts during the day without you noticing, and a misplaced roll is worse than no roll at all.
How should you adjust your chair for better back support?
A well-made lumbar roll loses most of its benefit if your chair is set up wrong. Seat height, seat depth, and monitor placement are the three adjustments that determine whether your lumbar support actually works.
Seat height is the foundation. Your feet should rest flat on the floor with your knees at roughly a 90-degree angle. A seat set too high causes you to slide forward, which breaks contact with your lumbar roll entirely. A seat set too low causes your hips to sink and your spine to round, undoing all the support you just built.
Essential ergonomic chair adjustments
- Seat height: Feet flat on the floor, knees level with or slightly below your hips.
- Seat depth: Two to three finger-widths of space between the back of your knees and the seat edge.
- Armrests: Set at elbow height so your shoulders stay relaxed, not raised.
- Monitor height: Top of the screen at or just below eye level to prevent forward head posture.
- Footrest: If your feet don’t reach the floor after adjusting, use a thick book or a folded yoga mat as a temporary footrest.
Ignoring seat depth is the most common mistake remote workers make. A seat that is too deep forces you to perch at the edge, which means your lumbar roll has nothing to press against. Slide forward, and your support disappears. Understanding why chair height affects posture is the fastest way to fix this problem for good.
Monitor placement matters more than most remote workers realize. A screen that sits too low pulls your head forward, which adds load to the entire spine, not just the neck. Stack books, a ream of paper, or a sturdy box under your monitor until the top edge sits at eye level.
Why movement matters as much as support
Lumbar support keeps your spine in the right position. Movement keeps the muscles around it from locking up. Both are required. Neither works well without the other.
Prolonged sitting without movement causes muscle tension and spinal fatigue within 2–3 hours, even with perfect lumbar support in place. That tension builds quietly. By the time you feel it, you are already behind on recovery.
“Movement breaks and desk exercises ease lower back tension and prevent stiffness that lumbar support alone cannot address.” — Mayo Clinic
The fix is simple: take a movement break every 60 minutes. You do not need a gym or a yoga mat. Stand up, walk to the kitchen, roll your shoulders back, and touch your toes. Two minutes is enough to reset your muscles and reduce accumulated spinal load.
- Cat-cow stretch: On hands and knees, alternate arching and rounding your back for 10 slow repetitions.
- Seated spinal twist: Sitting upright, rotate your torso gently to each side and hold for 15 seconds.
- Hip flexor stretch: Step one foot forward into a shallow lunge and hold for 20 seconds per side.
- Standing back extension: Stand with hands on your lower back and gently arch backward five times.
- Shoulder rolls: Roll both shoulders backward 10 times to release upper back tension.
Listen to early discomfort. A dull ache at 2 PM is your body signaling that something needs to change. Treat it as a warning, not background noise. Adjusting your lumbar roll, standing for five minutes, or doing a quick stretch at that moment prevents the kind of pain that follows you into the evening. Pairing movement with posture improvement habits is the most practical approach for remote workers who do not have access to a gym or a physical therapist.
Key Takeaways
A firm, correctly positioned DIY lumbar roll combined with proper seat height, seat depth, and regular movement breaks delivers effective lower back support in any makeshift home office setup.
| Point | Details |
|---|---|
| Use firm materials | Rolled bath towels and stuffed pillowcases outperform soft pillows for lasting lumbar support. |
| Position at the lumbar curve | Place the roll at the small of your back, not at the sacrum or mid-back. |
| Adjust seat height first | Feet flat on the floor prevents sliding and keeps your lumbar roll in contact with your back. |
| Move every 60 minutes | Short movement breaks prevent muscle tension that lumbar support alone cannot fix. |
| Function beats cost | A correctly placed $0 towel roll outperforms an expensive chair with poor adjustability. |
What I have learned from working with a rolled towel for months
I spent the better part of a year working from a dining chair with zero lumbar support before I tried the rolled towel method. My expectation was that it would feel like a temporary patch. What I found was the opposite.
The towel roll worked better than a decorative pillow I had been using for weeks. The pillow felt comfortable for the first hour, then quietly flattened out. The towel held its shape. That difference sounds small, but after six hours at a desk, it is the difference between finishing the day feeling okay and finishing it hunched over.
The bigger lesson was about seat height. I had the towel positioned perfectly but my chair was set too high. I kept sliding forward without realizing it, which meant the roll was pressing against air, not my back. Fixing the seat height took 30 seconds and immediately made the lumbar support feel like it was actually doing something.
My honest opinion: do not wait for a perfect ergonomic chair before you address your lower back. A well-placed towel roll and a properly adjusted seat solve most of the problem right now. Expensive equipment helps, but ergonomic equipment benefits only show up when the fundamentals are already in place. Get the fundamentals right first.
— Thomas
Your next step toward a more comfortable workday
If a rolled towel got you this far, imagine what purpose-built support can do for your back over the long term. Habitposture builds gear for people who spend 8 or more hours at a screen and need real support without the bulk of a medical brace.
Habitposture’s posture support products are designed for real life: the Zoom calls, the late-night sessions, the days when you forget to move for three hours straight. Whether you are looking for wearable posture support or guidance on building a better home office setup, Habitposture has practical tools that work with your body, not against it. Visit Habitposture to find the right support for your workday.
FAQ
What household items work best for DIY lumbar support?
A tightly rolled bath towel secured with rubber bands or Velcro is the most effective household option. It provides firm, adjustable support and costs nothing.
Where exactly should I place lumbar support on my chair?
Place the support at the natural inward curve of your lower back, roughly at belly-button height when seated. Avoid placing it too low near the sacrum or too high in the mid-back.
How often should I take breaks when sitting with lumbar support?
Take a movement break every 60 minutes. Lumbar support reduces spinal load, but regular movement prevents the muscle tension and stiffness that sitting alone creates.
Does seat height affect how well lumbar support works?
Yes. A seat set too high causes you to slide forward, breaking contact with your lumbar support entirely. Feet flat on the floor with knees at hip level keeps the support in the right position.
Can a DIY lumbar roll replace a proper ergonomic chair?
A correctly positioned DIY lumbar roll addresses the most common cause of lower back pain in seated workers. It does not replace a fully adjustable ergonomic chair, but it delivers meaningful relief in any makeshift home office setup.